Friday, October 17, 2014
How to Make Photo Memorybooks for Free
Back when I had Hadley (my oldest), I started scrapbooking. This eventually turned into digital scrapbooking and then after seeing a few photobooks that my sister made, I decided that that was how I wanted to document our photos and memories.
I've used a couple different photobook companies, and the one I prefer is Shutterfly. They have a lot of templates and you can really personalize your pages quite easily.
To get them for free, all you need to do is go to the Shutterfly homepage and sign up for their promotional offers that they send you via email. The deals they send are pretty good, sometimes 50% off photobooks, and occasionally they even offer a free photobook (you just have to pay shipping.) The free books are usually for the 8x8 sized books, so that is the size that I make all of mine.
After making them for a few years, I have figured out a process for making them that works for me:
1. Decide what your photobook is going to be about - I do one for each year of each child's life (at least that's my plan for now) so if I'm making one for Hadley when she was 6 years old, I know that the pictures I'll need will be from Dec 2011-Dec 2012.
2. Decide how many pages you want your book to be. If you are getting a book with a free coupon code with Shutterfly, only 20 pages are free. Each additional page is $1. For this reason, all my books are only 20 pages.
3. Write out what you want to have on each page.This is how I did Hadley's last book that I made. I always have a title page and then the last page is just a collage with pictures that didn't make it in the "scrapped" pages, but that I still wanted to document. I try to go chronologically through the year, starting with their birthday, but sometimes I have to fudge things to match up the single paged topics.
4. Look through all your pictures for that timeframe/topic and write out the file names of the ones you want under each topic heading. The underlined dates are the folder name, and then the numbers listed are each picture that I want in the book (not all the pictures make the final cut).
5. Go to Shutterfly and sign in or create an account. Choose the photobook and layout that you want. Some layouts cost more, so make sure yours does not (unless you want to pay a little more.)
6. Upload the pictures you want, using your handy paper as a guide.
7. Go page by page selecting the pictures you want for that page and then changing the format and styles until you are satisfied with the final result. I like to add a short written part to document things a little more.
8. Save your book and wait until you get an email with a free photobook coupon code. (Or order it right away because your too impatient and are willing to pay $30...)
*you will still need to pay shipping when you use a free coupon code, but it's not much. Shipping to Canada is $8.
Our kids LOVE looking through these books and I love that all those cute pictures aren't just hiding away in the computer.
Here are two that my sister made to give you some more ideas. One she made with pictures from one of our family reunions. The other was from a mom/sister trip that we made. She included journal entries along with the pictures.
There are other companies that offer great deals on the books too. A month ago, I got an email from snapfish for a buy 1 get 2 free photobook deal. So look around and just sign up for the promotion emails and be patient!
Thursday, September 25, 2014
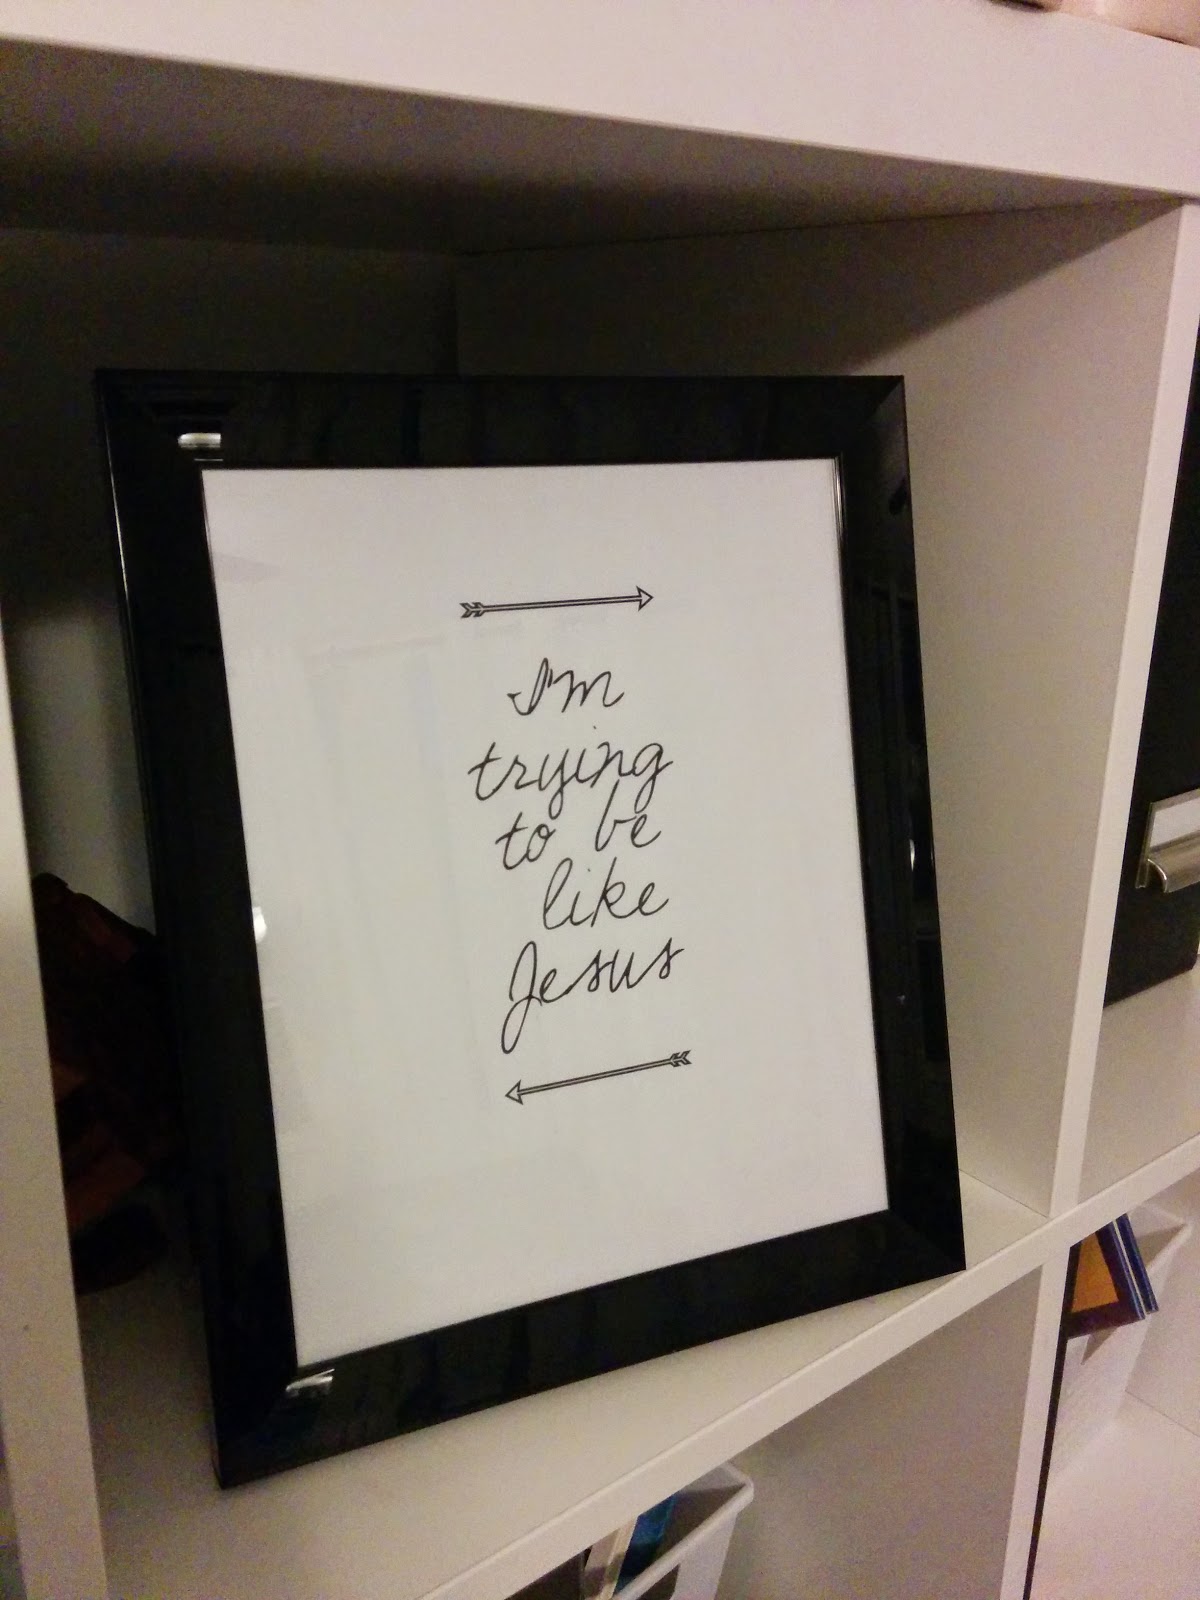
I'm trying to be like Jesus - Free printable
About a year ago, our family came up with a Family Motto. I had intentions of painting some sort of cute art with the words of our motto: "I'm trying to be like Jesus", from the LDS primary song. It's one of my (and my husband's) favorites, and reminds me that we are all just trying to be a little better each day. That is all that matters. The canvas, that I intended to paint this masterpiece on, hid under our couch and has remained untouched. I don't know if I'll ever get to it, so I played around today and made this instead:
If you'd like to print your own, just click on the above image and save it to your computer. The resolution for the arrows isn't the greatest, but on my 8x10 print, it looks ok. Enjoy!
Wednesday, April 2, 2014
How to convert a countertop to a breakfast bar
I've always wanted a breakfast bar in our kitchen, so naturally, when planning the layout of our kitchen, I was determined to make it work.
We got our cupboards used off of kijiji and designed it so that we had a peninsula that we could make into a breakfast bar. We had to modify the back of the bottom cupboards that were now exposed, by adding a bookshelf to the empty corner and by adding a thin board to make it look like board and batten backing.
I bought these Capita brackets from IKEA to make the breakfast bar. We really didn't want to have to drill through the granite though, so we returned them and I kept trying to figure out how to make something work.
Because of the colour of our granite, it would be pretty hard to match, and I didn't want it to look like the new bar was supposed to match, but didn't, so I thought something that was a different material would look best. The Numerar countertop from IKEA was relatively inexpensive and could easily be cut to size and I thought it would look great.
Because there is a door right by where this would be, we could only have the counter extended by 9 inches, which is too narrow to comfortably use for eating, so it would need to overlap with the granite at least 3 inches. Here's what we came up with after several trial designs and with a little help from some friends.
John planed and sanded a 2x4 down so that it was perfectly square and flat and pre-drilled the holes for screwing it to the butcher block. I painted it the same white as our cupboards then John screwed it to the butcher block (after cutting it to the right size). John then made 2 support braces and pre-drilled holes for them. I painted them and then we screwed the supports to the butcher block.
We carefully spread granite glue along the top edge of the counter where the 2x4 would sit, then screwed the supports in place. We clamped it all together and let it sit for a day and a half. We were a little nervous about how it would hold up, but it is very secure and stable.
After reading lots of reviews and blogs about how people finished off their Numerar countertops, we decided to just use mineral oil. You just rub a generous amount on with a rag and reapply until it stops being absorbed into the wood. I used lots the first week and now have just applied it every few days. When there is a mark that won't wash off, I just sand it and add oil. We'll see how it holds up in the long run.
I love it and am SO happy with how it turned out! (excuse the Spiderman photo-bomber!......)
We got our cupboards used off of kijiji and designed it so that we had a peninsula that we could make into a breakfast bar. We had to modify the back of the bottom cupboards that were now exposed, by adding a bookshelf to the empty corner and by adding a thin board to make it look like board and batten backing.
I bought these Capita brackets from IKEA to make the breakfast bar. We really didn't want to have to drill through the granite though, so we returned them and I kept trying to figure out how to make something work.
Because of the colour of our granite, it would be pretty hard to match, and I didn't want it to look like the new bar was supposed to match, but didn't, so I thought something that was a different material would look best. The Numerar countertop from IKEA was relatively inexpensive and could easily be cut to size and I thought it would look great.
Because there is a door right by where this would be, we could only have the counter extended by 9 inches, which is too narrow to comfortably use for eating, so it would need to overlap with the granite at least 3 inches. Here's what we came up with after several trial designs and with a little help from some friends.
John planed and sanded a 2x4 down so that it was perfectly square and flat and pre-drilled the holes for screwing it to the butcher block. I painted it the same white as our cupboards then John screwed it to the butcher block (after cutting it to the right size). John then made 2 support braces and pre-drilled holes for them. I painted them and then we screwed the supports to the butcher block.
We carefully spread granite glue along the top edge of the counter where the 2x4 would sit, then screwed the supports in place. We clamped it all together and let it sit for a day and a half. We were a little nervous about how it would hold up, but it is very secure and stable.
After reading lots of reviews and blogs about how people finished off their Numerar countertops, we decided to just use mineral oil. You just rub a generous amount on with a rag and reapply until it stops being absorbed into the wood. I used lots the first week and now have just applied it every few days. When there is a mark that won't wash off, I just sand it and add oil. We'll see how it holds up in the long run.
I love it and am SO happy with how it turned out! (excuse the Spiderman photo-bomber!......)
Wednesday, March 19, 2014
main bathroom reno
So we are finishing up this phase of our renos. Both bathrooms are completely done so here is our main bathroom. Here is the before:
John's uncle built a bulkhead in the ceiling to cover the plumbing for the upstairs bathroom and added potlights to it. He moved the vanity and mirror to the upstairs bathroom and took out the lovely green tub and replaced it with a new white one and put in plumbing for the shower head.
Then we painted and did the flooring and put in a new tub surround and bath fixtures and new sink and vanity from ikea. The paint colour is "Aviator Silver" by CIL. It took me forever to decide on a color and I was worried when I started painting that it looked too purple, but I think it looks ok now. We got a mirror from Homesense and finally finished up the baseboards. I love it. Eventually I would like to add some shelves above the toilet. Here are the after shots:
And a final side by side shot
I'm so happy with how things are coming together!
Then we painted and did the flooring and put in a new tub surround and bath fixtures and new sink and vanity from ikea. The paint colour is "Aviator Silver" by CIL. It took me forever to decide on a color and I was worried when I started painting that it looked too purple, but I think it looks ok now. We got a mirror from Homesense and finally finished up the baseboards. I love it. Eventually I would like to add some shelves above the toilet. Here are the after shots:
And a final side by side shot
I'm so happy with how things are coming together!
Wednesday, February 26, 2014
kitchen reno update
Our renovations (for now) are wrapping up and I thought I'd share the progress of our complete kitchen renovation.
Here's what it looked like before we bought it. We closed up that window in the middle and that is where our current stove is.
Here's the same spot after we got possession and started the renos.
You can see the new piece of drywall behind the hood fan where we covered the window. We found used oak cabinets on kijiji which came with granite countertops and a wall oven and gas cooktop stove for a great deal and eventually painted them white.
A couple more weeks later we started the marble herringbone backsplash. I loved the marble, and really it wasn't that much more expensive than other ceramic tile, so we splurged.
We (with my Mom's help) finished up painting the cupboards after a few more weeks passed.
Finally we finished the tile and grout! I LOVE it and am so happy that we were able to do this kitchen for so cheap.
We still have a few things to finish up, but I'm loving the progress so far.
And now for a classic before and after shot (except not from the same angle)....
Here's what it looked like before we bought it. We closed up that window in the middle and that is where our current stove is.
Here's the same spot after we got possession and started the renos.
You can see the new piece of drywall behind the hood fan where we covered the window. We found used oak cabinets on kijiji which came with granite countertops and a wall oven and gas cooktop stove for a great deal and eventually painted them white.
A couple more weeks later we started the marble herringbone backsplash. I loved the marble, and really it wasn't that much more expensive than other ceramic tile, so we splurged.
We (with my Mom's help) finished up painting the cupboards after a few more weeks passed.
Finally we finished the tile and grout! I LOVE it and am so happy that we were able to do this kitchen for so cheap.
We still have a few things to finish up, but I'm loving the progress so far.
And now for a classic before and after shot (except not from the same angle)....
Saturday, February 8, 2014
Nellie is walking!.....sort of.
Nellie is finally starting to figure out this walking thing. She was playing with this hockey stick last night and started standing up and hitting a toy car with it, so naturally I grabbed my phone to record this monumental occurrence!
Sunday, September 22, 2013
Home owners = home renos
So this summer we found a house that fit our budget and decided to take the plunge to buy a home. Basically everything needs to be updated, so we are thick in the middle of home renos. It is actually a lot of fun for me and I am kind of glad that everything needs to be done, so now we can make it how we like it. We were able to get 10% added to our mortgage for home improvements, so we are working away at that. Because we are super cheap and doing all the work ourselves, we have been able to stretch it quite far.
Originally we planned on building an addition......not enough money, so we decided to renovate the existing house, and then eventually refinance and build an addition. We are working on the main floor first.
Here are the pics from when we first looked at the house:
livingroom
diningroom
kitchen
hall
My mom and dad helped out the first weekend and ripped out the carpet, sanded the textured walls (luckily they hadn't ever painted them so it sanded off easily), removed cupboards, and painted the walls this color. These pics are before we painted.
diningroom
kitchen
livingroom
We removed the lino in the kitchen and hall so it was level with the livingroom to prepare for installing our vinyl flooring. Luckily John's brothers are nice and have been helping out a ton.
We found oak cabinets with granite countertops on kijiji (someone was re-doing their kitchen) for $800 and finally got them in a configuration that worked.
We had to take out a window so that we would have more cupboard space and a hoodfan above the cooktop.
We got rid of the hideous, cast iron - weird shaped sink, so we had to cut the granite to fit our sink
John did the plumbing for the sink, hooked up gas for the stove (and bbq), and hooked up the electrical for the hoodfan, stove, and wall oven. I have been working at painting the cabinets white (even though many have questioned my desire to paint oak....gasp!) I'm loving how it's coming along.
Our kitchen in all it's messy glory!
We installed this vinyl flooring from Costco online in the livingroom (and will do the whole main floor with it)
It is a lot darker than I thought it would be, but I like how it looks.
This weekend, we were able to get the last of the granite installed, and John is working on a floor to ceiling cabinet for the corner by the fridge.
Our curtains finally arrived, so now I can actually turn on the lights at night and not feel exposed. I ordered these from JCPenney and love them. I still need to put them up in our livingroom though.
What's left for the main floor:
- finish painting cabinets
- flooring for kitchen, dining, hall, and bathroom
- install backsplash (marble in a herringbone pattern)
- install the raised counter on peninsula for barstools
- replace tub and surround in bathroom
- paint bathroom (still trying to decide on colour)
- paint and install baseboards
- replace windows (eventually)
We've also installed carpet in the bedrooms and plan on doing the hall and stairs. So far we've spent a little over half of the money - but a lot of that is purchases for things yet to be done.
Upstairs we plan on:
- making the room that should have been a bathroom into a bathroom with a tub/shower
- baseboards and finish carpet
- paint bedrooms and hall
- replace hall windows
Basement plans:
- seal walls
- drywall
- level floor so we can install vinyl flooring
- replace windows
So, we'll see how much we can get done with the money we have allotted, and then just keep working away at it when we can. If you've made it through this monstrous post, you're nice. I plan on updating our progress semi-regularly.....maybe. We'll see how it goes!
Originally we planned on building an addition......not enough money, so we decided to renovate the existing house, and then eventually refinance and build an addition. We are working on the main floor first.
Here are the pics from when we first looked at the house:
livingroom
diningroom
hall
My mom and dad helped out the first weekend and ripped out the carpet, sanded the textured walls (luckily they hadn't ever painted them so it sanded off easily), removed cupboards, and painted the walls this color. These pics are before we painted.
diningroom
kitchen
livingroom
We removed the lino in the kitchen and hall so it was level with the livingroom to prepare for installing our vinyl flooring. Luckily John's brothers are nice and have been helping out a ton.
We had to take out a window so that we would have more cupboard space and a hoodfan above the cooktop.
Our kitchen in all it's messy glory!
We installed this vinyl flooring from Costco online in the livingroom (and will do the whole main floor with it)
It is a lot darker than I thought it would be, but I like how it looks.
This weekend, we were able to get the last of the granite installed, and John is working on a floor to ceiling cabinet for the corner by the fridge.
Our curtains finally arrived, so now I can actually turn on the lights at night and not feel exposed. I ordered these from JCPenney and love them. I still need to put them up in our livingroom though.
What's left for the main floor:
- finish painting cabinets
- flooring for kitchen, dining, hall, and bathroom
- install backsplash (marble in a herringbone pattern)
- install the raised counter on peninsula for barstools
- replace tub and surround in bathroom
- paint bathroom (still trying to decide on colour)
- paint and install baseboards
- replace windows (eventually)
We've also installed carpet in the bedrooms and plan on doing the hall and stairs. So far we've spent a little over half of the money - but a lot of that is purchases for things yet to be done.
Upstairs we plan on:
- making the room that should have been a bathroom into a bathroom with a tub/shower
- baseboards and finish carpet
- paint bedrooms and hall
- replace hall windows
Basement plans:
- seal walls
- drywall
- level floor so we can install vinyl flooring
- replace windows
So, we'll see how much we can get done with the money we have allotted, and then just keep working away at it when we can. If you've made it through this monstrous post, you're nice. I plan on updating our progress semi-regularly.....maybe. We'll see how it goes!
Subscribe to:
Posts (Atom)